It is currently Sat Apr 20, 2024 7:16 am

All times are UTC


THE PROP DEN is primarily a Darth Vader Prop Discussion Board, but we also deal with other Star Wars Props as well as Prop Replicas from other movies. If you do not yet have an account, set one up, sign in and jump into the Vader Prop Discussions!


Post new topic Reply to topic  [ 45 posts ]  Go to page 1, 2, 3  Next
Author Enter your Message here
 Post subject: SgtFang Boba Fett Kit
PostPosted: Sun Mar 25, 2007 4:12 am 
Offline
User avatar

Joined: Thu Dec 21, 2006 10:46 pm
Posts: 5241
Location: San Jose, CA
Foreword

Image

Darth Vader has somehow become my all-time favorite icon in the Star Wars universe. But another wonderful character -- my second favorite -- happens to be Boba Fett.

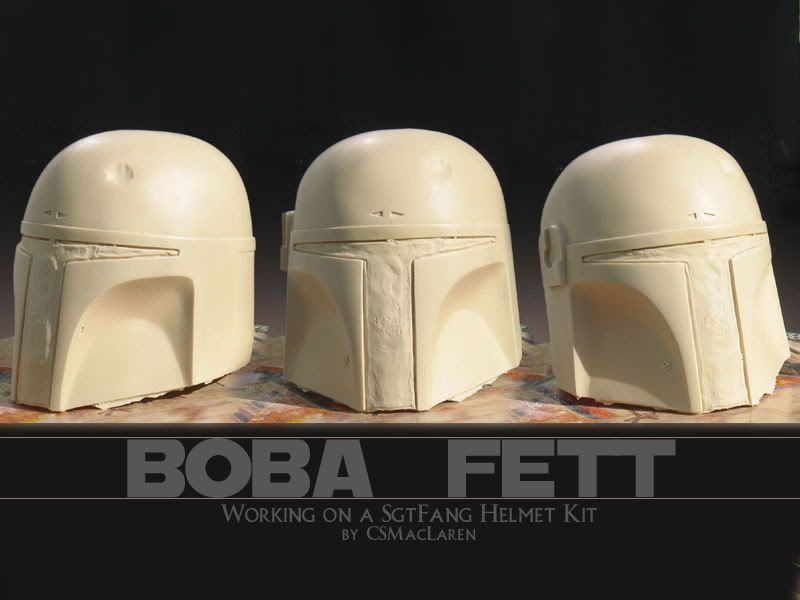
His helmet is deceptively simple. It's often nicknamed as a "bucket" by fans and friends over at TheDentedHelmet.com (TDH) and yet his helmet's paint scheme is one of the most complicated in the Star Wars universe. In fact, a full costume complete with specially-made milled aluminum parts can get quite expensive.

Image

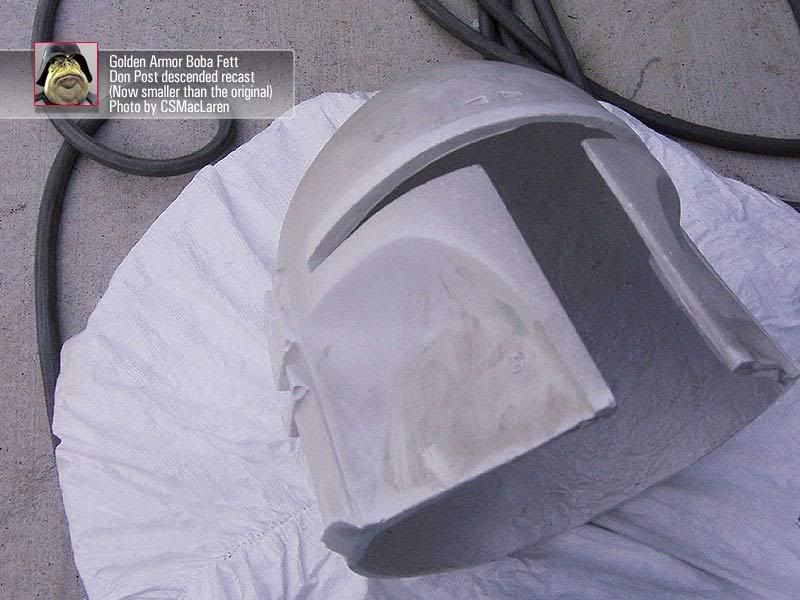
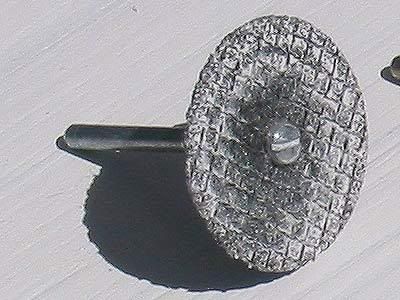
This is my second kit ever. The first (in the above photo) I owned was a Golden Armor Fett kit that was a 1995 era Don Post that was squashed a bit to make the helmet opening flare out more to resemble the profile of Fett's appearance at Bespin in The Empire Strikes Back. After cutting out the "T" visor area and sanding the interior, that Golden Armor kit soon after found a new owner.

Image

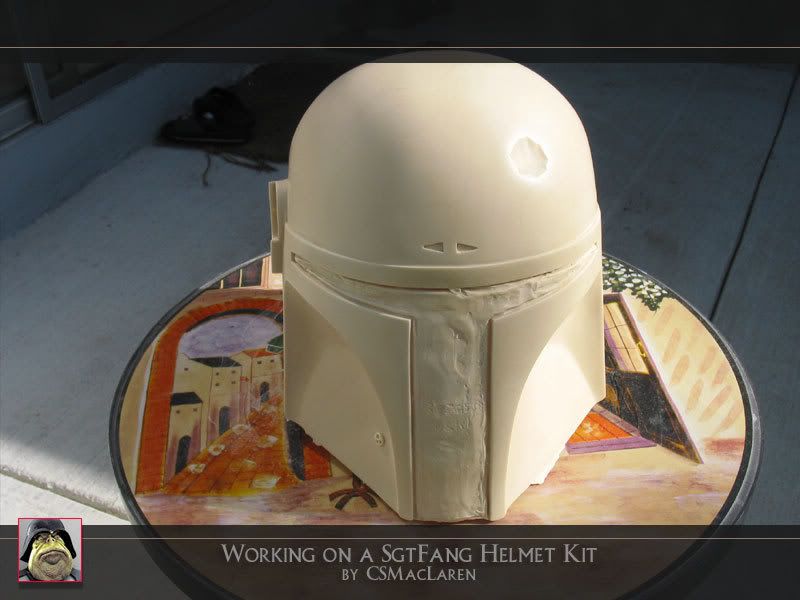
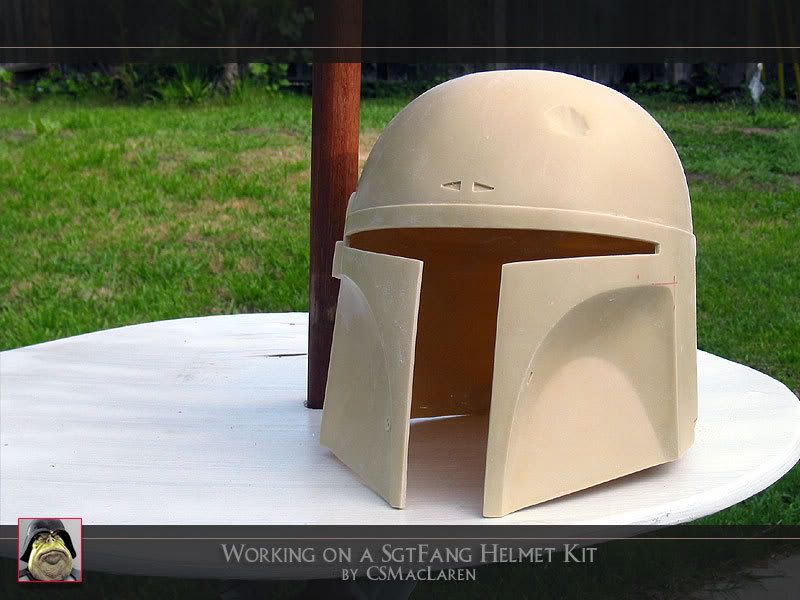
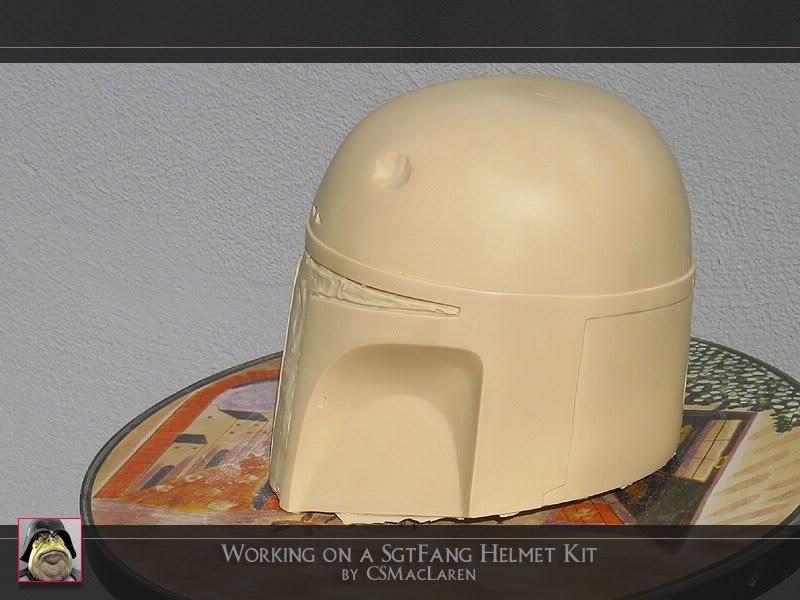
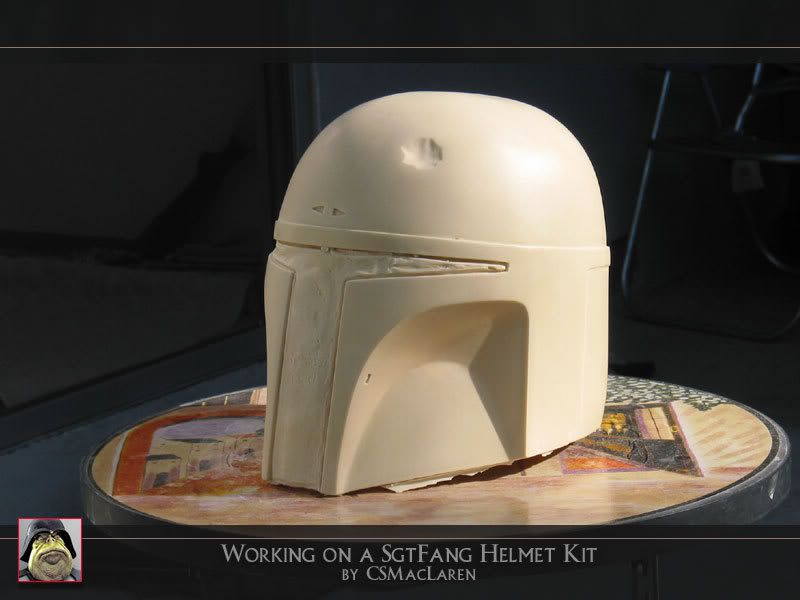
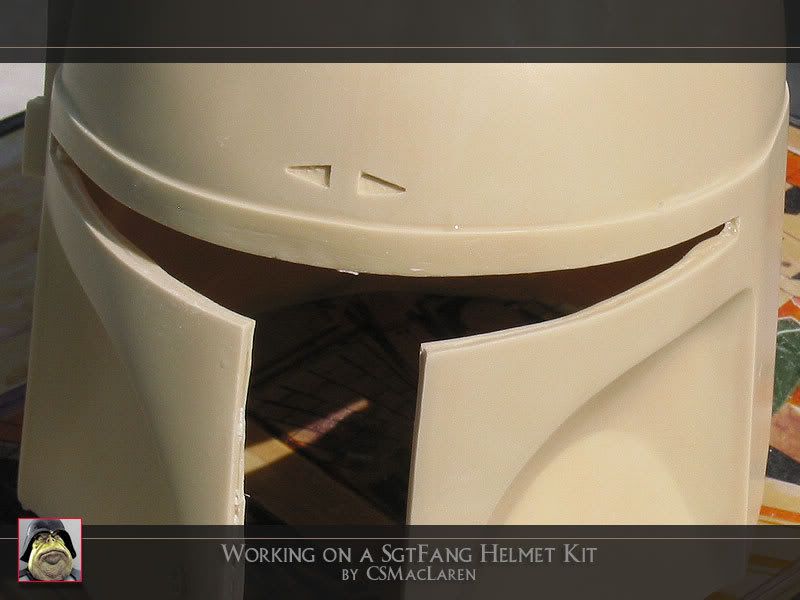
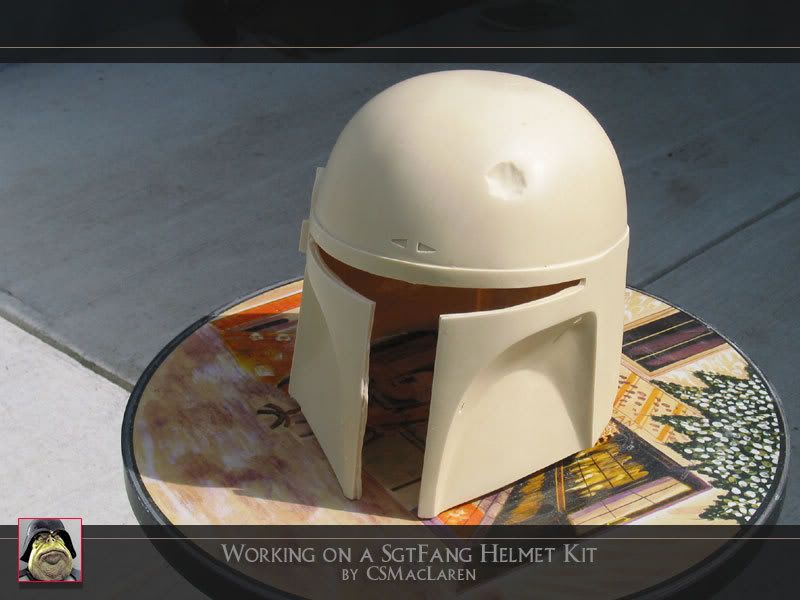
The SgtFang kit (above) is based off of an ebay finding that came to be known as the "Lava" helmet (no relation to the lava scene in Episode 3) due to its unsightly appearance:

Image

The source of this helmet is a mystery, and various controversial explanations exists. This current iteration has been pointed out by some fans on TDH that there are details that are inconsistent with the screen-used helmet, but they are minor and correctable.

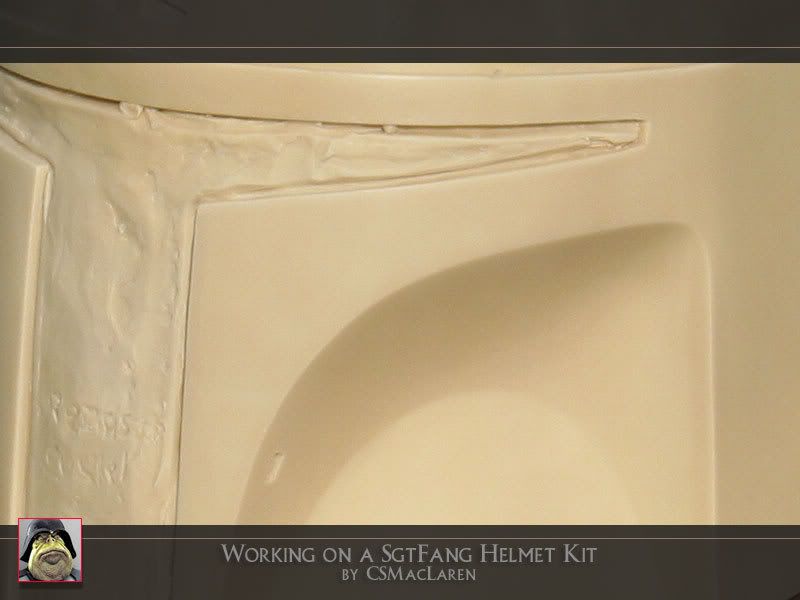
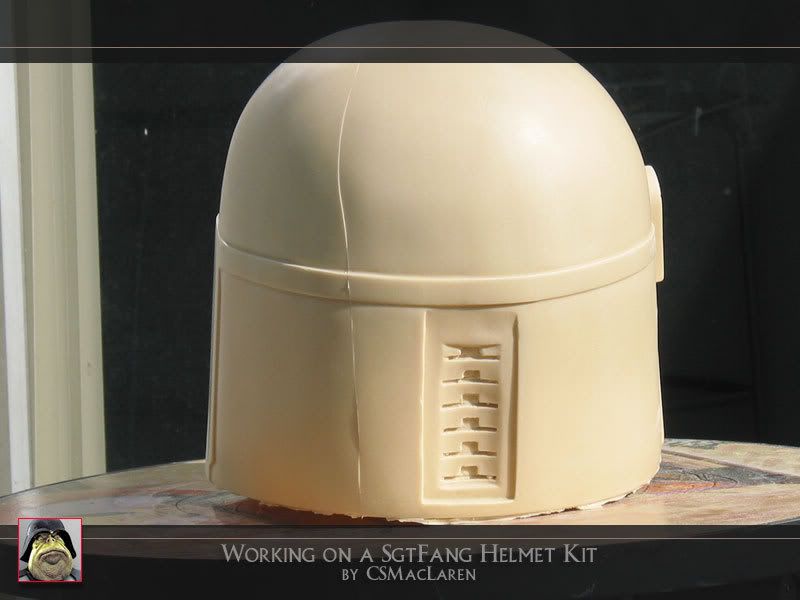
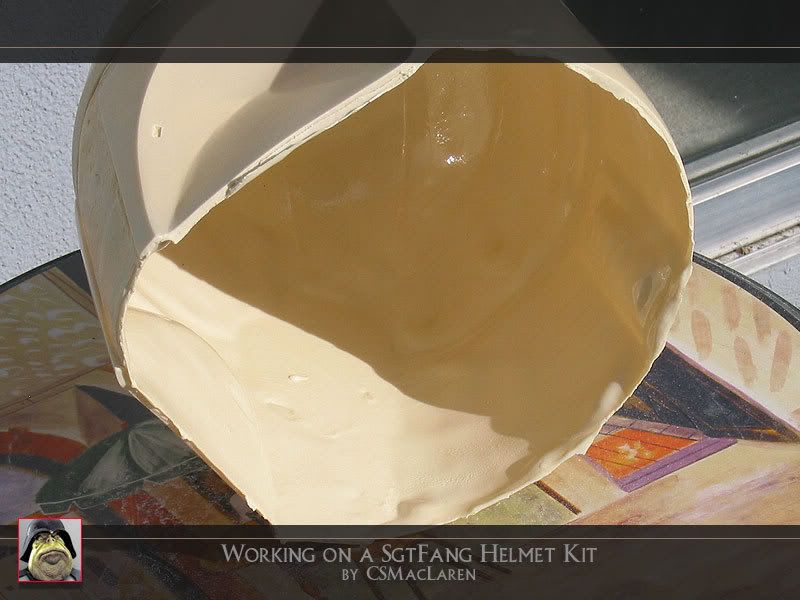
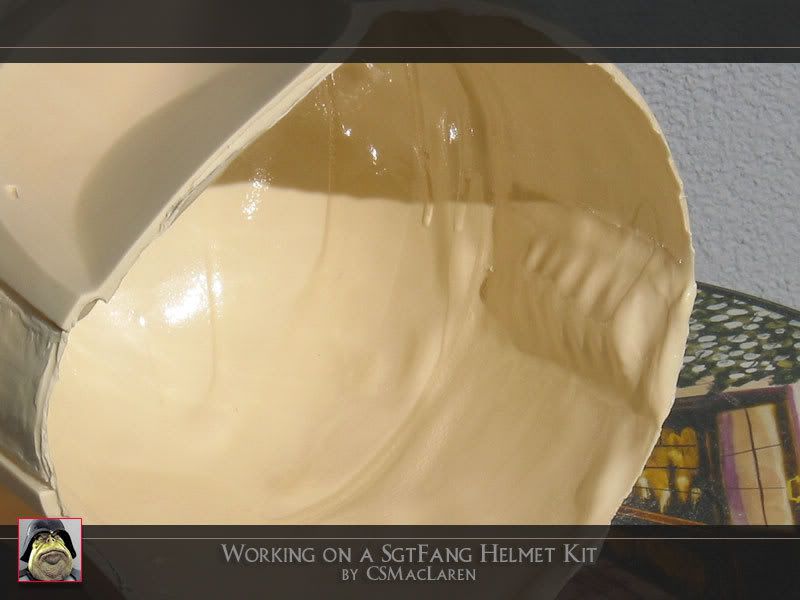
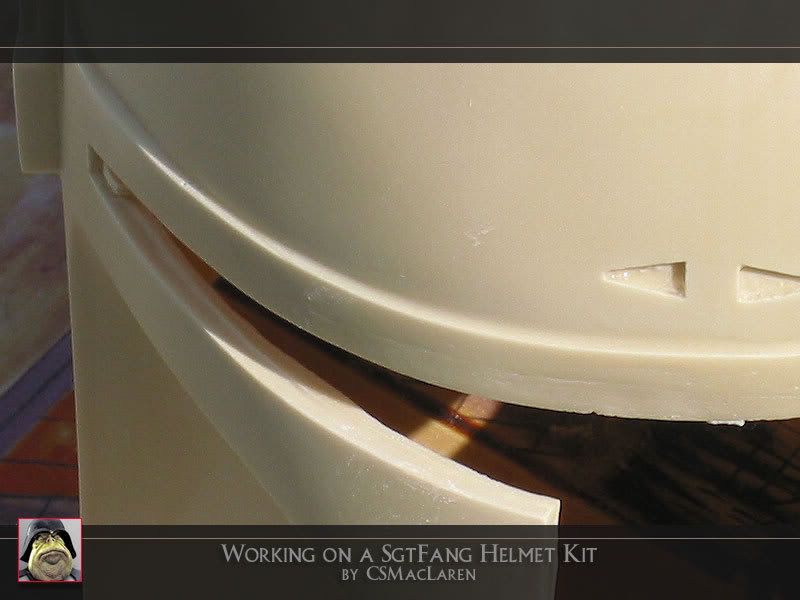
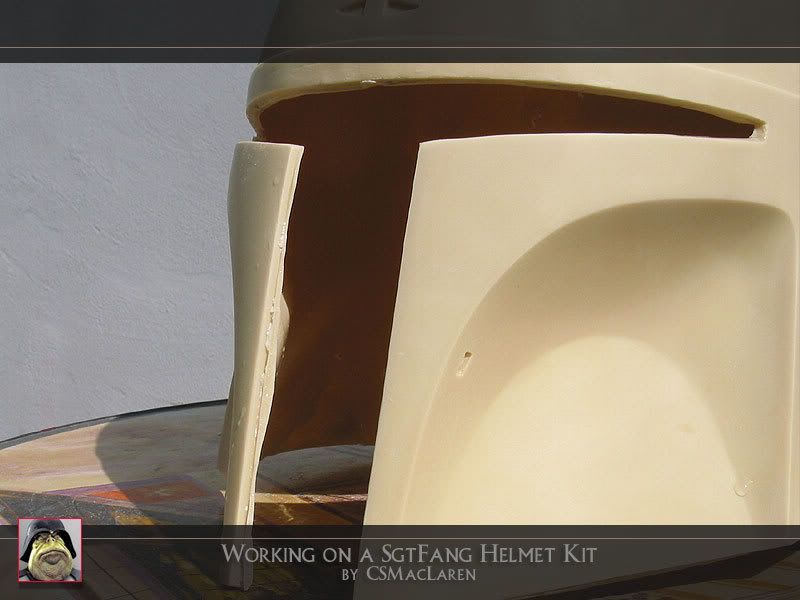
This is a resin kit. Given my experience with very bad kits, this -- while not being perfect -- is refreshing to look at. There are some tiny casting holes and bubbles here and there (some in very difficult to access areas), and the interior could use a bit of sanding down.

The amount of cleanup is nowhere near the scale required for the Golden Armor kits, and yet despite their horrific raw appearance I am actually grateful because my skills and experience have been forged in an accelerated fashion having worked with three Golden Armor kits.

I therefore feel the tweaks, cleanup and modifications to the SgtFang kit to be relatively straightforward.

I will be using AquaMend for all repairs.

Image

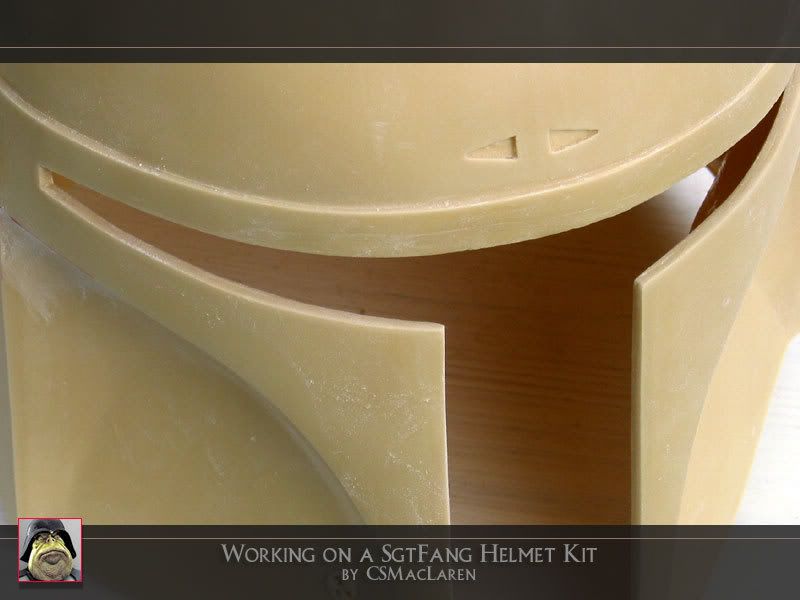
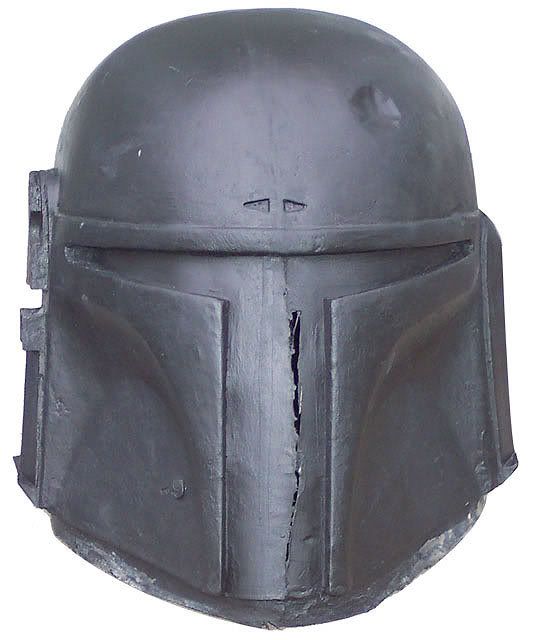
One of the first telltale signs of inaccuracy is the shape of the corners of the cheeks, just beneath the normally red-painted visor area, right next to the ears (see picture, above). The SgtFang's are rounded (though he doing a Version 2 which will have various tweaks) and the screen-used helmet has the corners more squared. This will be an interesting modification.

So why did I buy this?

Extremely accurate movie-sized helmets are difficult to come by -- where we are talking down-to-the-milimeter accuracy. There are various fan sculpts that are fantastic looking and highly coveted.

The SgtFang is not necessarily the best of the "hotter" kits, but it is definitely one of the more well known, possibly due to the noteriety of the "Lava" helmet.

I also got this at a very good price directly from SgtFang on TDH, and recieved it within a week.

I wanted to have a good kit to start with -- but one that was at last on par with minimum level of quality expected by Fett experts. Affordable, accurate when tweaked, and attractive.

_________________
Cordially,

- Mac
( Follow me on Facebook: https://www.facebook.com/sculptingvader/ )


Top
 Profile  
 
 Post subject:
PostPosted: Sun Mar 25, 2007 4:14 am 
Offline
User avatar

Joined: Thu Dec 21, 2006 10:46 pm
Posts: 5241
Location: San Jose, CA
Image

The back side of the helmet.

Image

Here is a closeup of the back of the helmet. As you can see, a significant amount of detailing using a dremel will be required.

Also that line/scar will need sanding/filling using Aquamend epoxy putty. I believe this line is the seam of the molds.

_________________
Cordially,

- Mac
( Follow me on Facebook: https://www.facebook.com/sculptingvader/ )


Top
 Profile  
 
 Post subject:
PostPosted: Sun Mar 25, 2007 4:17 am 
Offline
User avatar

Joined: Thu Dec 21, 2006 10:46 pm
Posts: 5241
Location: San Jose, CA
Image

The left side (as you're wearing it) of the helmet. This area is flat because an ear piece will later be adhered to it. There is a little notch on the lower right side of the area just before the helmet's opening. Apparently this is at the wrong angle and needs to be levelled off.

_________________
Cordially,

- Mac
( Follow me on Facebook: https://www.facebook.com/sculptingvader/ )


Top
 Profile  
 
 Post subject:
PostPosted: Sun Mar 25, 2007 4:18 am 
Offline
User avatar

Joined: Thu Dec 21, 2006 10:46 pm
Posts: 5241
Location: San Jose, CA
Image

Even unpainted, Fett's quite a handsome guy....

_________________
Cordially,

- Mac
( Follow me on Facebook: https://www.facebook.com/sculptingvader/ )


Top
 Profile  
 
 Post subject:
PostPosted: Sun Mar 25, 2007 4:19 am 
Offline
User avatar

Joined: Thu Dec 21, 2006 10:46 pm
Posts: 5241
Location: San Jose, CA
The interior of the helmet:

Image

The interior back side of the helmet:

Image

Note the build up of resin. This should be straightforward to sand out.

_________________
Cordially,

- Mac
( Follow me on Facebook: https://www.facebook.com/sculptingvader/ )


Top
 Profile  
 
 Post subject:
PostPosted: Sun Mar 25, 2007 12:41 pm 
Offline
Site Admin
User avatar

Joined: Tue Sep 05, 2006 12:23 pm
Posts: 1197
Location: Turkey
Cool project. :thumbsup
I'm definitely going to be watching this.

I got one of his TIE's a little while ago and it's great, especially for the price.


Top
 Profile  
 
 Post subject:
PostPosted: Sun Mar 25, 2007 10:58 pm 
Offline
User avatar

Joined: Thu Dec 21, 2006 10:46 pm
Posts: 5241
Location: San Jose, CA
Today, I used this:

Image

and did this:

Image

Basically, I removed the the material in the "T" shaped area. Ultimately the lens would go here.

_________________
Cordially,

- Mac
( Follow me on Facebook: https://www.facebook.com/sculptingvader/ )


Top
 Profile  
 
 Post subject:
PostPosted: Sun Mar 25, 2007 10:59 pm 
Offline
User avatar

Joined: Thu Dec 21, 2006 10:46 pm
Posts: 5241
Location: San Jose, CA
Image

Do to some unevenness of thickness of the resin in this area, the walls of the visor area vary in thickness.

Image

_________________
Cordially,

- Mac
( Follow me on Facebook: https://www.facebook.com/sculptingvader/ )


Top
 Profile  
 
 Post subject:
PostPosted: Sun Mar 25, 2007 10:59 pm 
Offline
User avatar

Joined: Thu Dec 21, 2006 10:46 pm
Posts: 5241
Location: San Jose, CA
I also did a little bit of trimming and sanding at the helmet opening.

Image

I'll have to figure out how to refine the "T" shaped area....

_________________
Cordially,

- Mac
( Follow me on Facebook: https://www.facebook.com/sculptingvader/ )


Top
 Profile  
 
 Post subject:
PostPosted: Sun Mar 25, 2007 11:31 pm 
Offline
User avatar

Joined: Sat Jan 06, 2007 6:05 pm
Posts: 1312
Location: Pennsylvania
Mac...you need to get a hobby or something....you can't keep sitting around doing nothing all day...its not healthy. :blah

_________________
" Life is tough....it's tougher if your stupid. "


Top
 Profile  
 
 Post subject:
PostPosted: Mon Mar 26, 2007 12:06 am 
Offline
User avatar

Joined: Thu Dec 21, 2006 10:46 pm
Posts: 5241
Location: San Jose, CA
Really?

I have a lot of vacation time saved up with my company. I was going to take a whole week off and try to finish off all my Star Wars helmets! :ac6

_________________
Cordially,

- Mac
( Follow me on Facebook: https://www.facebook.com/sculptingvader/ )


Top
 Profile  
 
 Post subject:
PostPosted: Mon Mar 26, 2007 12:18 am 
Offline
User avatar

Joined: Sat Jan 06, 2007 6:05 pm
Posts: 1312
Location: Pennsylvania
Vacation time?...whats that? I'm pretty sure the last time I had vacation was back in 86...just after high school. :cry Oh well time enough for rest in the grave. Looking foreward to this project. I've thought about one of these from time to time. :thumbsup

_________________
" Life is tough....it's tougher if your stupid. "


Top
 Profile  
 
 Post subject:
PostPosted: Mon Mar 26, 2007 5:09 pm 
Offline
User avatar

Joined: Wed Oct 11, 2006 2:51 pm
Posts: 21
Location: Roanoke TX
Looking good. One mistake lots of folks make is not thinning out the depth around the mandibles.

Image


Top
 Profile  
 
 Post subject:
PostPosted: Mon Mar 26, 2007 6:35 pm 
Offline
User avatar

Joined: Thu Dec 21, 2006 10:46 pm
Posts: 5241
Location: San Jose, CA
"Mandibles"? That's a neat word for it. Reminds me of a grasshopper!

Thanks for posting that, but I'm already ahead of you. This is still a work in progress. But the point is perfect because it's a great lead-in for this next stage I'm about to share:

Image

So here is some work, again with the visor area (which Fett-ologists refer to as the "Mandibles" -- interesting difference in forum cultures!) where I've reduced the thickness of the exposed areas.

_________________
Cordially,

- Mac
( Follow me on Facebook: https://www.facebook.com/sculptingvader/ )


Last edited by CSMacLaren on Mon Mar 26, 2007 6:59 pm, edited 1 time in total.

Top
 Profile  
 
 Post subject:
PostPosted: Mon Mar 26, 2007 6:37 pm 
Offline
User avatar

Joined: Thu Dec 21, 2006 10:46 pm
Posts: 5241
Location: San Jose, CA
Most of his cleanup was done by filework. There is some flexibility to the cheek plates so I can get a file in there without breaking them. As you proceed towards the very corners of the eyes, it is advisable to use thinner and smaller files.

Image

_________________
Cordially,

- Mac
( Follow me on Facebook: https://www.facebook.com/sculptingvader/ )


Top
 Profile  
 
Display posts from previous:  Sort by  
Post new topic Reply to topic  [ 45 posts ]  Go to page 1, 2, 3  Next

All times are UTC


Who is online

Users browsing this forum: No registered users and 0 guests


You cannot post new topics in this forum
You cannot reply to topics in this forum
You cannot edit your posts in this forum
You cannot delete your posts in this forum
You cannot post attachments in this forum

Jump to:  
cron
Blue Moon by Trent © 2007
Powered by phpBB © 2000, 2002, 2005, 2007 phpBB Group
Hosted by Freeforum.ca, get your free forum now! TOS | Support Forums | Report a violation
MultiForums powered by echoPHP phpBB MultiForums