It is currently Sat Apr 20, 2024 1:30 am

All times are UTC


THE PROP DEN is primarily a Darth Vader Prop Discussion Board, but we also deal with other Star Wars Props as well as Prop Replicas from other movies. If you do not yet have an account, set one up, sign in and jump into the Vader Prop Discussions!


Post new topic Reply to topic  [ 179 posts ]  Go to page 1, 2, 3, 4, 5 ... 12  Next
Author Enter your Message here
 Post subject: Don Post Standard - Total Conversion Project
PostPosted: Sun Aug 12, 2007 11:37 pm 
Offline
User avatar

Joined: Thu Dec 21, 2006 10:46 pm
Posts: 5241
Location: San Jose, CA
A friend of mine is very petite. She currently has a Don Post Standard that fits her proportionately. I just felt she deserved something more accurate to go with her costume.

Image

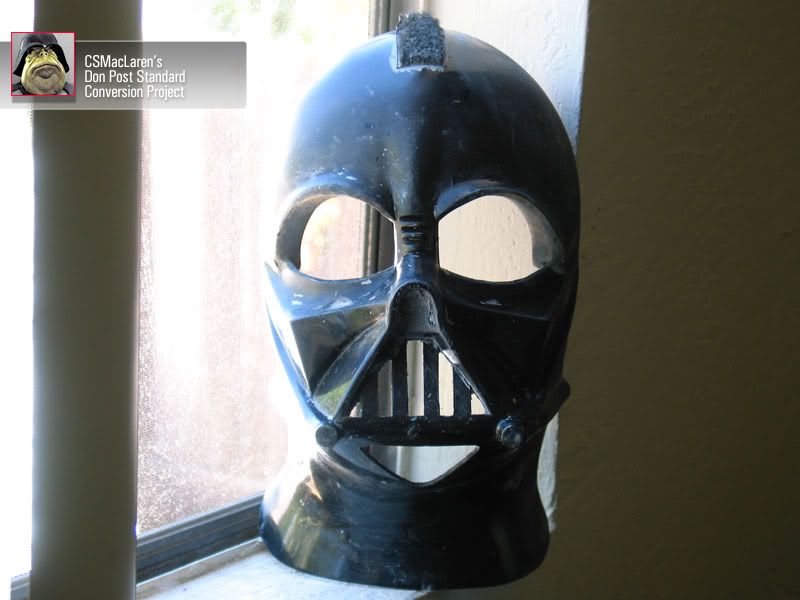
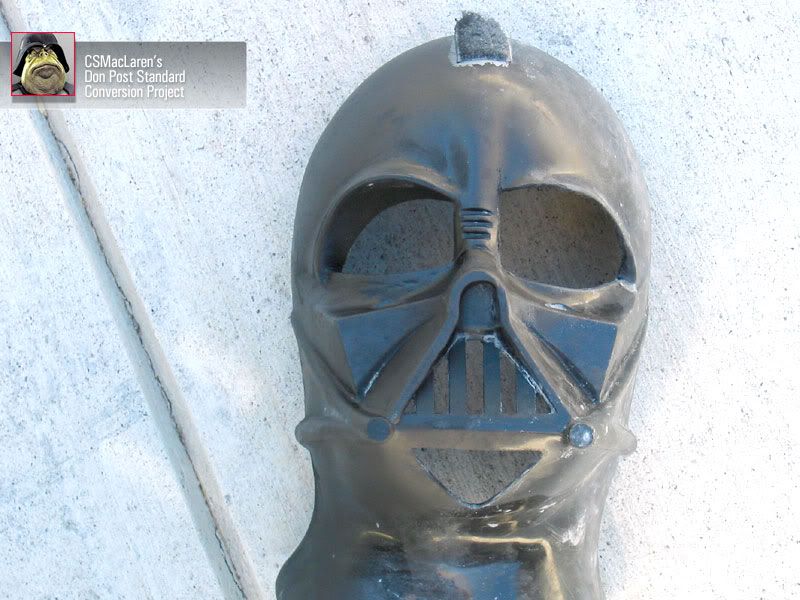
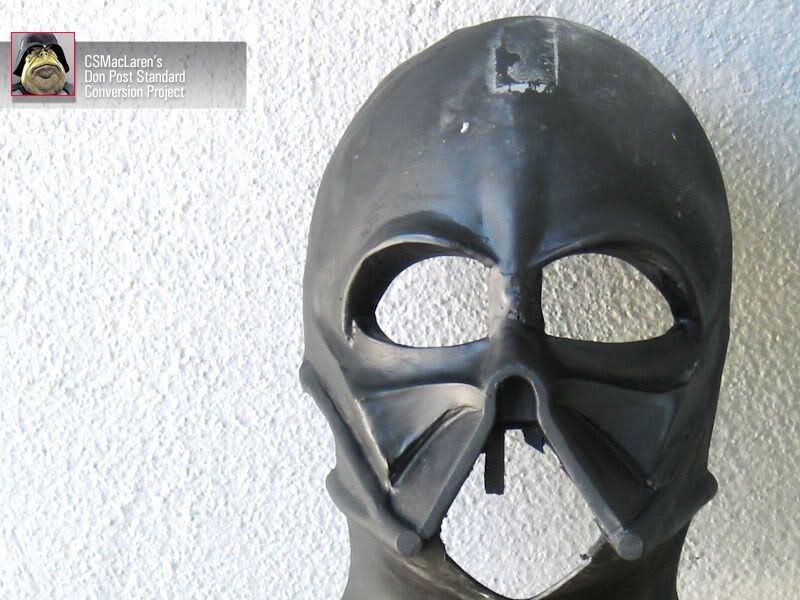
It had been a while since I purchased this. I got it for around $10 off eBay. It's features are inaccurate, but it's head shape is quite nice. The challenge is to create a scaled down helmet.

T-VIRUS graciously offered to do the dome work, so once again we are joining forces, and this time we are trying to make a difference in the life of a disabled friend and fellow Star Wars fan.

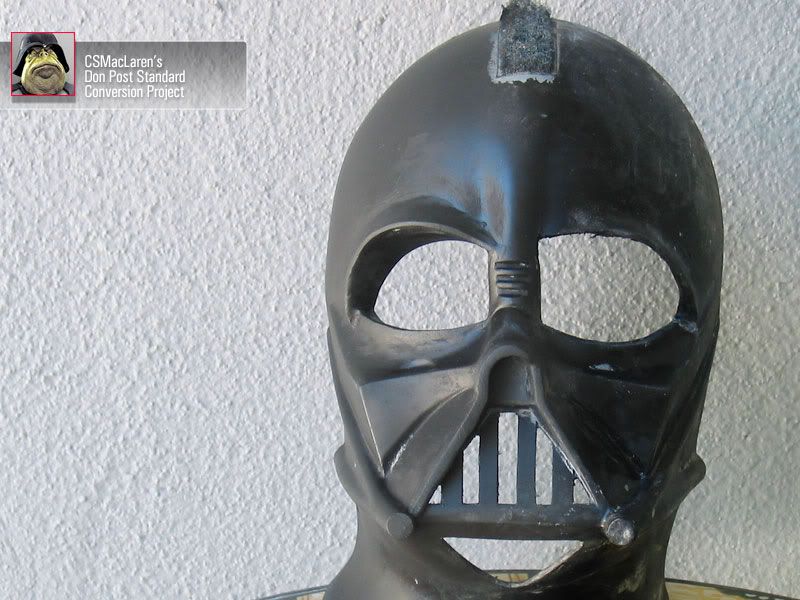
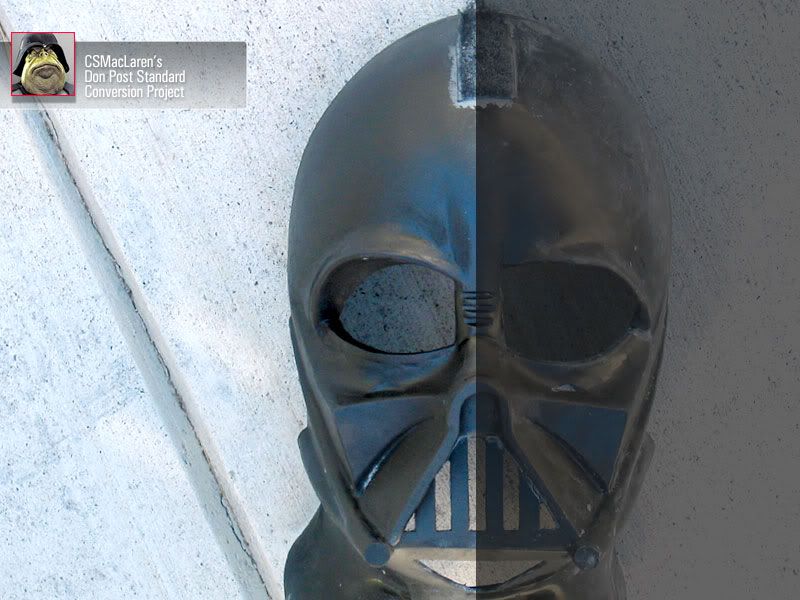
Okay, so let's study this for a moment.

Image

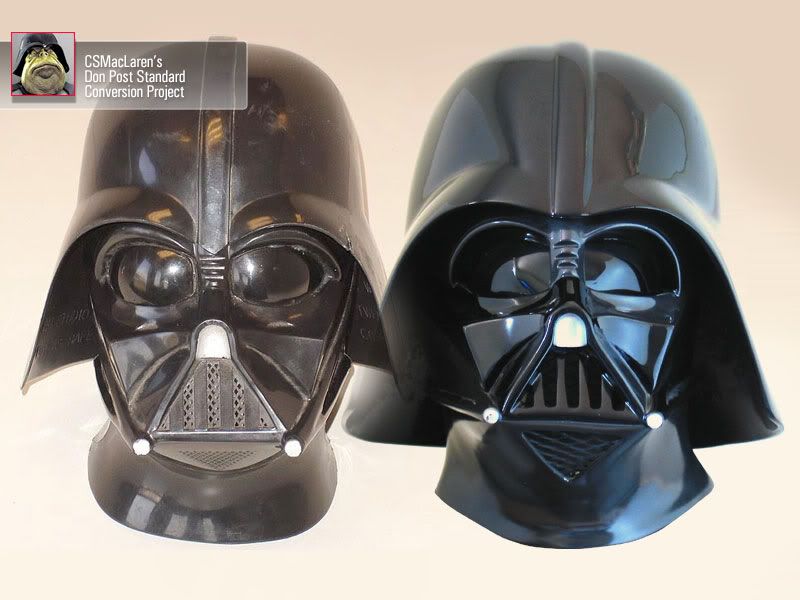
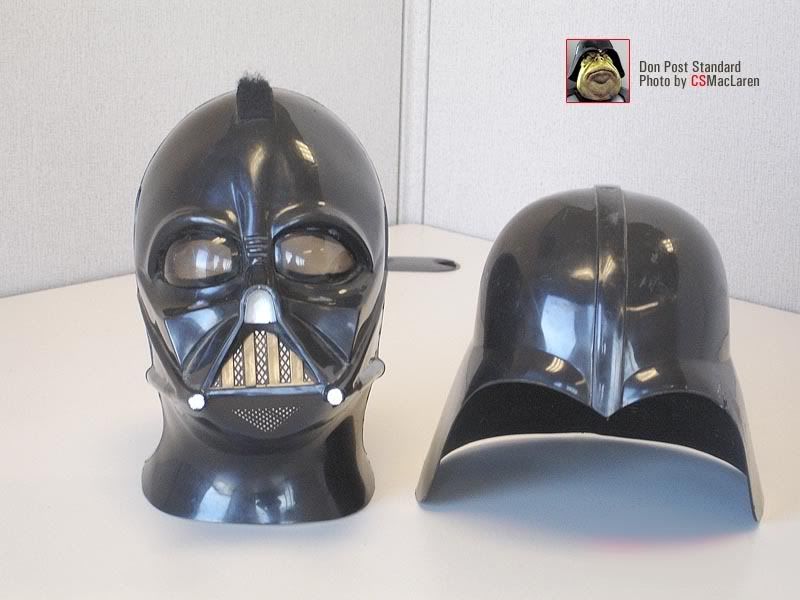
Left: the Don Post Standard (plastic/vinyl, child-size).
Right: the Don Post Deluxe (a fiberglass limited edition, 1:1 scale)

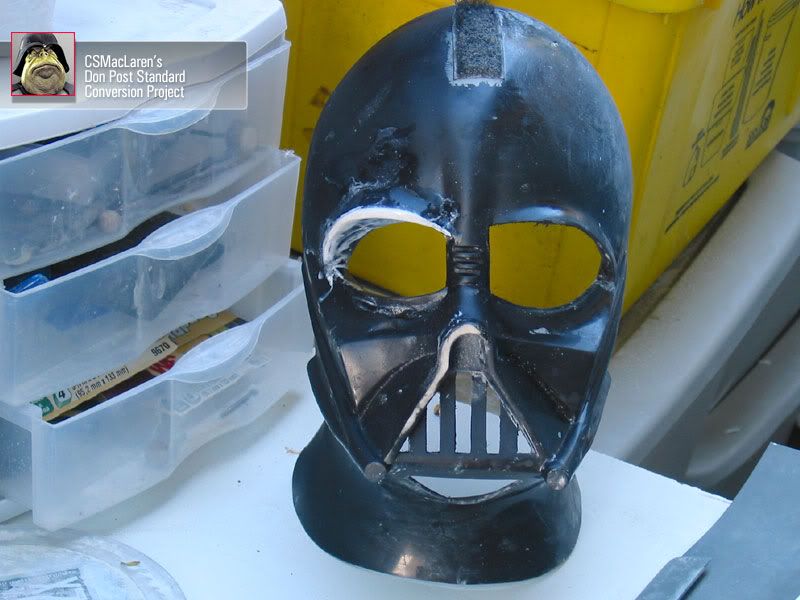
There's a lot that can be done to this. I've seen some people modify this by replacing the lenses and filing out the mouth grill and triangular hole, then give it automotive paint.

The mods I am planning go much farther than that, in that I will address the fundamental structure of the helmet.

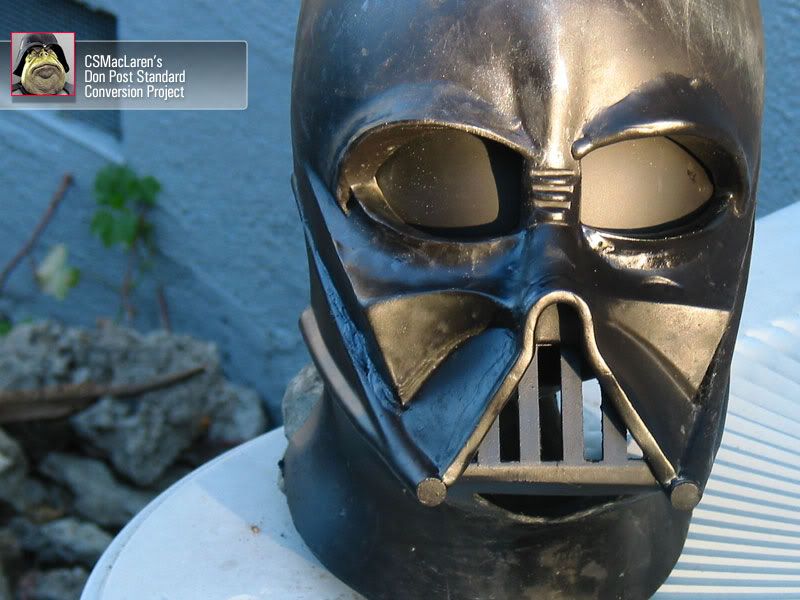
Since this is smaller and thinner than a Rubie's Supreme Vader, the project is more manageable. (I had already sworn on my comic book collection that I would not modify another Rubie's plastic helmet again. I hate plastic. I loathe it. I detest it. )

Yes, yes, hate leads to suffering.

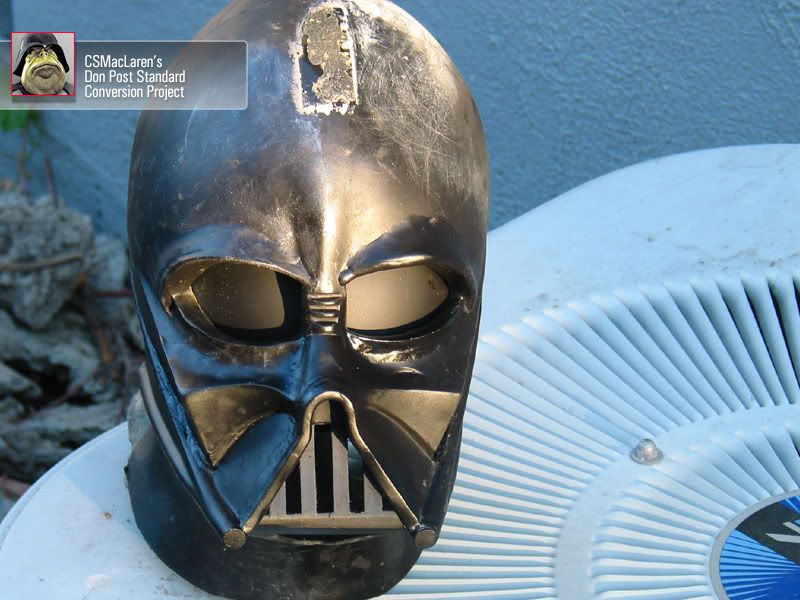
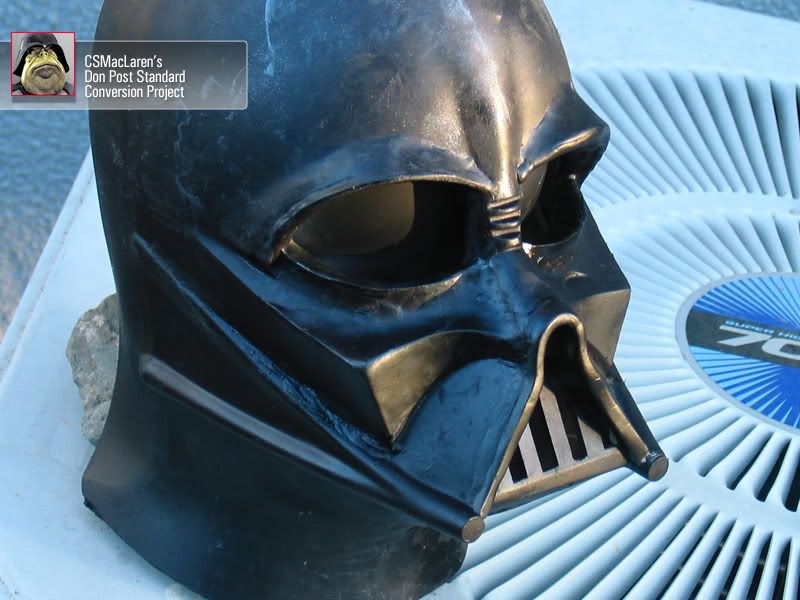
So what's inaccurate about the DPS? Well, just about everything.

What's right about it? It has a pleasant skull shape, and a slender-headed adult can just barely squeeze into the thing.

_________________
Cordially,

- Mac
( Follow me on Facebook: https://www.facebook.com/sculptingvader/ )


Last edited by CSMacLaren on Wed Aug 13, 2008 2:44 am, edited 1 time in total.

Top
 Profile  
 
 Post subject:
PostPosted: Sun Aug 12, 2007 11:44 pm 
Offline
User avatar

Joined: Thu Dec 21, 2006 10:46 pm
Posts: 5241
Location: San Jose, CA
Q. Mac, are you nuts?
A. Duh....

Q. Mac, why spend time on something so clearly a lost cause? Haven't you learned from the Rubie's?
A. (1) No. (2) It's for a good cause. (3) I like the challenge. (4) I'm a slow learner.

Q. Is this ANH, ESB or ROTJ?
A. Don't know. Depends on what her costume turns out to be.

Q. How accurate are you gonig to try to get this?
A. Though I am also very limited by its own natural shape. I will do what I can.


Image

So this is where I had last left off with this. Kinda reminds me of Mr. T.

Now here is the freaky part. If I put this in its current state next to a Hasbro Voice Changer mask, it's face shape is nearly IDENTICAL. The Hasbro's cheeks are more parallel, is generally more refined, and the neck is shorter. Even the mouth is the same width! (Hmmm... so who really owns those Don Post production molds... after all, Lucasfilm owns 40%+ shares of Hasbro.)

_________________
Cordially,

- Mac
( Follow me on Facebook: https://www.facebook.com/sculptingvader/ )


Top
 Profile  
 
 Post subject:
PostPosted: Sun Aug 12, 2007 11:46 pm 
Offline
User avatar

Joined: Thu Dec 21, 2006 10:46 pm
Posts: 5241
Location: San Jose, CA
Image

Here, the title of this picture is, "Zen and the Art of putting Crap on your mask to make it more screen-accurate so that the online community will think more highly of you!"

The nose and mouth walls are very short. I am hoping that by lengthening the walls that the tip of the nose will naturalyl be lower and more proportionate with the face.

_________________
Cordially,

- Mac
( Follow me on Facebook: https://www.facebook.com/sculptingvader/ )


Top
 Profile  
 
 Post subject:
PostPosted: Sun Aug 12, 2007 11:46 pm 
Offline
User avatar

Joined: Thu Dec 21, 2006 10:46 pm
Posts: 5241
Location: San Jose, CA
Image

And here is some sanding and priming to see it in all black. Obviously I'm just doing the left side for now just for comparison purposes.

_________________
Cordially,

- Mac
( Follow me on Facebook: https://www.facebook.com/sculptingvader/ )


Top
 Profile  
 
 Post subject:
PostPosted: Sun Aug 12, 2007 11:47 pm 
Offline
User avatar

Joined: Thu Dec 21, 2006 10:46 pm
Posts: 5241
Location: San Jose, CA
Must have menace.

Image

It's an okay start.

_________________
Cordially,

- Mac
( Follow me on Facebook: https://www.facebook.com/sculptingvader/ )


Top
 Profile  
 
 Post subject:
PostPosted: Sun Aug 12, 2007 11:48 pm 
Offline
User avatar

Joined: Thu Dec 21, 2006 10:46 pm
Posts: 5241
Location: San Jose, CA
Image

Ah, looking much better. Oooo, I like how the eye turned out. Why couldn't I get the Rubie's eye to look this good the first time out? Rassen-frassen...!

So next mods will include the sides of the face, as well as the side cheek lines, the other eye, etc.

Just lots of stuff.

More on this later!

_________________
Cordially,

- Mac
( Follow me on Facebook: https://www.facebook.com/sculptingvader/ )


Top
 Profile  
 
 Post subject:
PostPosted: Mon Aug 13, 2007 2:19 am 
Offline
User avatar

Joined: Thu Dec 21, 2006 10:46 pm
Posts: 5241
Location: San Jose, CA
Here are some more. The sun is setting and I do need to give 24 hours for the epoxy clay to cure. I couldn't help but shoot black primer on it to see what it looks like. This can become a bad habit because your mask can end up having too much primer on it. My goal is to basically build it structurally to a point where I will do an initial casting, then work off of the casting. That way I can work with resin, and stuff like Aquamend are far more compatable with it.

Everything is still very rough, so please pardon the inaccuracies. I have to do things bit by bit, let things cure, and then work another area in the meantime.

Image

_________________
Cordially,

- Mac
( Follow me on Facebook: https://www.facebook.com/sculptingvader/ )


Top
 Profile  
 
 Post subject:
PostPosted: Mon Aug 13, 2007 2:20 am 
Offline
User avatar

Joined: Thu Dec 21, 2006 10:46 pm
Posts: 5241
Location: San Jose, CA
I may end up completely resculpting the bridge of the nose as well as the arch of the nose.

The eyes are starting to have that movie look.

Image

My mods to think the face are starting to look decent too!

_________________
Cordially,

- Mac
( Follow me on Facebook: https://www.facebook.com/sculptingvader/ )


Top
 Profile  
 
 Post subject:
PostPosted: Mon Aug 13, 2007 2:22 am 
Offline
User avatar

Joined: Thu Dec 21, 2006 10:46 pm
Posts: 5241
Location: San Jose, CA
Image

Here's a side shot.

There's going to be a lot of sculpting, material removal, sanding and refinement ahead. I'll build out the tusk tubes a bit better. They look flat and obscure.

_________________
Cordially,

- Mac
( Follow me on Facebook: https://www.facebook.com/sculptingvader/ )


Top
 Profile  
 
 Post subject:
PostPosted: Mon Aug 13, 2007 2:25 am 
Offline
User avatar

Joined: Thu Dec 21, 2006 10:46 pm
Posts: 5241
Location: San Jose, CA
And here is a final beauty shot of the day.

Image

More later!

_________________
Cordially,

- Mac
( Follow me on Facebook: https://www.facebook.com/sculptingvader/ )


Top
 Profile  
 
 Post subject:
PostPosted: Mon Aug 13, 2007 2:56 am 
Offline
User avatar

Joined: Sun Jun 10, 2007 5:44 pm
Posts: 17
Location: B.C. CANADA
damn,impressive improvement already Mac. that's going to be one unique Vader helmet. :wtf


Top
 Profile  
 
 Post subject:
PostPosted: Mon Aug 13, 2007 3:15 am 
Offline
User avatar

Joined: Wed Jun 20, 2007 5:23 am
Posts: 304
Location: USA
Dude, your nuts. But thats some really nice work.


Top
 Profile  
 
 Post subject:
PostPosted: Mon Aug 13, 2007 12:02 pm 
Offline
Site Admin
User avatar

Joined: Thu Aug 31, 2006 8:58 am
Posts: 10910
Location: Denmark
Looking great. Only mods I would have suggested were the cheeks, trimming the teeth narrower or re-doing them, and the left side of the neck, but you certainly went WAY BEYOND that. WOW.

Really cool.

One thing though, regarding the cheeks. Don't stop building it up to where it naturally stops on the sculpt. Build it out further, so that it is level with the corner of the eye, when looking at it from the front. The face is pinched on these helmets - from cheek corner to cheek corner - you need to widen it. Here's a picture showing what I mean - exaggerated slightly:

Image

_________________
Check us out at Facebook!
http://www.facebook.com/ThePropDen


Top
 Profile  
 
 Post subject:
PostPosted: Mon Aug 13, 2007 5:51 pm 
Offline
User avatar

Joined: Thu Dec 21, 2006 10:46 pm
Posts: 5241
Location: San Jose, CA
Thanks guys, and thanks, NHM.

NHM, I'm not sure I agree with the buildout you're suggesting. I will eventually reshape the skull, but there needs to be a flow from wide (back / rear opening) to narrow (front) and prematurely making the cheeks too wide will alter the flow, not to mention make the face appear wider, which it already does.

Quote:
Image


These photos weren't taken 6 feet back, but if you look face on, the cheek corners should not be wider than the eyes themselves, and right now theyr'e just about where I need them.

I just sawed out the mouth and will replace the teeth. I also sawed out the arch of the nose to replace it with the asymmetrical "dip" on the left side of the arch (as you look at it). The bridge of the nose will eventually be replaced completely.

_________________
Cordially,

- Mac
( Follow me on Facebook: https://www.facebook.com/sculptingvader/ )


Top
 Profile  
 
 Post subject:
PostPosted: Mon Aug 13, 2007 10:42 pm 
Offline
User avatar

Joined: Thu Dec 21, 2006 10:46 pm
Posts: 5241
Location: San Jose, CA
Image

Added some skull buldge (this is adding material, not using heat to manipulate the palstic).

Filed the right eye (as you're looking at it) a bit.

Added some meat to the cheeks.

Sculpted in an upper left tusk tube

I decided to eradicate the mouth because the mouth walls were obscuring the teeth holes, as they are too far apart and too straight.

_________________
Cordially,

- Mac
( Follow me on Facebook: https://www.facebook.com/sculptingvader/ )


Top
 Profile  
 
Display posts from previous:  Sort by  
Post new topic Reply to topic  [ 179 posts ]  Go to page 1, 2, 3, 4, 5 ... 12  Next

All times are UTC


Who is online

Users browsing this forum: No registered users and 0 guests


You cannot post new topics in this forum
You cannot reply to topics in this forum
You cannot edit your posts in this forum
You cannot delete your posts in this forum
You cannot post attachments in this forum

Jump to:  
cron
Blue Moon by Trent © 2007
Powered by phpBB © 2000, 2002, 2005, 2007 phpBB Group
Hosted by Freeforum.ca, get your free forum now! TOS | Support Forums | Report a violation
MultiForums powered by echoPHP phpBB MultiForums